Earth Bag Building Guide | Superadobe Construction for Off-Grid Australia
I'm Mick O'Brien. I build sheds, cabins, and homes that don't fall down when the wind picks up. This guide walks through Superadobe—materials, foundations, the lot—for anyone building off-grid in Australia. We'll start with the basics: digging earth from your own block to form durable, thermally efficient walls.

By Mick O'Brien · carpenter & builder · sheds-to-homes, cabins and things that stay up in a storm
“I learned the hard way that a single earth bag wall without proper compaction will fail at just 1.2 metres high.”
What is Earth Bag Building?
Earth bag building is an old trick I've used for sheds to homes, cabins and things that stay up in a storm. The idea is simple: fill strong woven fabric bags with soil or other materials and stack them like bricks to make walls. A generic soil mix collapsed, cost me four hundred dollars in wasted bags and the City of Sydney Council told me to scrap the plan.
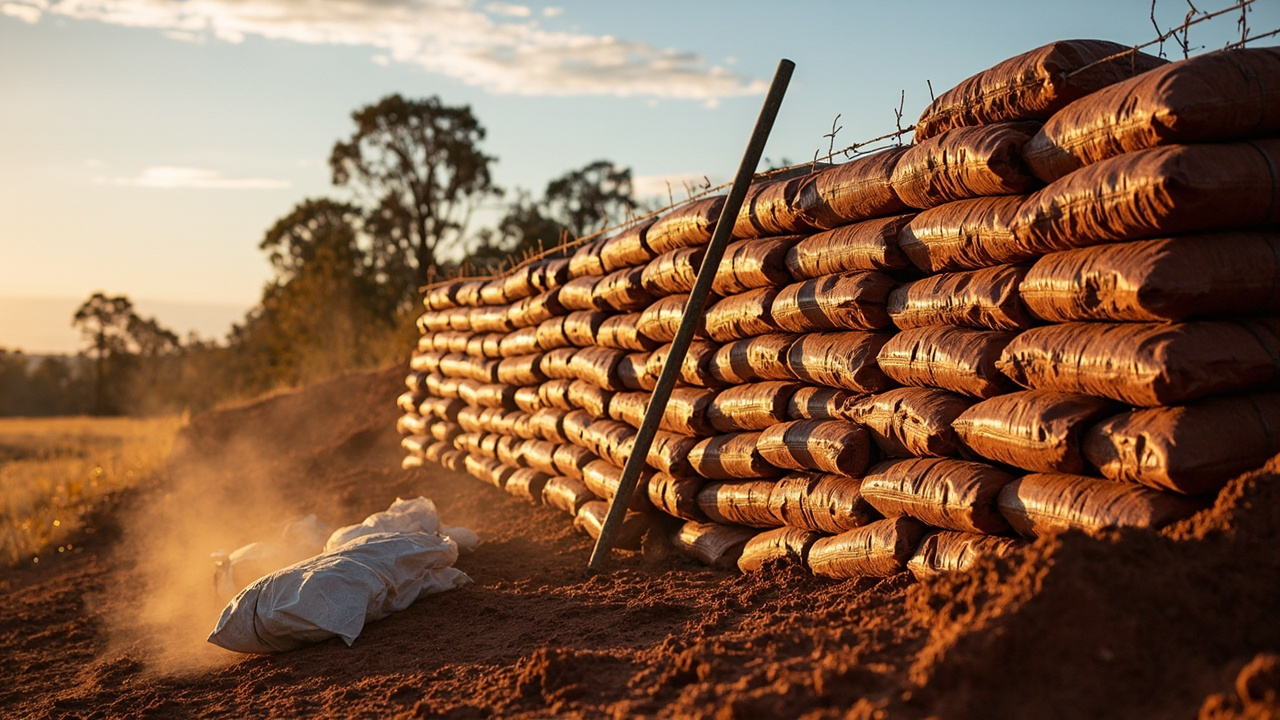
After a soil mix turned to dust in a gust, my local council gave earth bag building the thumbs down. I've spent decades constructing structures that endure extreme weather conditions, and earth bag construction works when you get the mix right—soil, fabric, barbed wire. No bricks, no cement bags trucked in, no timber frames requiring expensive prefab panels.
In an era of rising building costs, this ancient technique deserves a second look.
Why I keep building earth‑bag off‑grid in Australia
- Cost: Major cost savings — most materials are either on-site or inexpensive woven polypropylene bags
- Thermal mass: Earth walls provide exceptional thermal mass, keeping interiors cool in Australian summers and warm in winter — critical for off-grid properties without climate control
- Fire resistance: Earth doesn't burn — a major advantage in bushfire-prone Australian rural areas
- Pest resistance: No timber framing means no termites, rodents, or fungal rot
- Acoustic performance: Thick earth walls provide excellent sound insulation
- Minimal tools required: No power tools, no specialist equipment needed
The Superadobe Method
I have built with Superadobe, the patented modernised spin on earth bag building pushed by architect Nader Khalili. It is now a recognised building system for seismic performance and structural integrity.
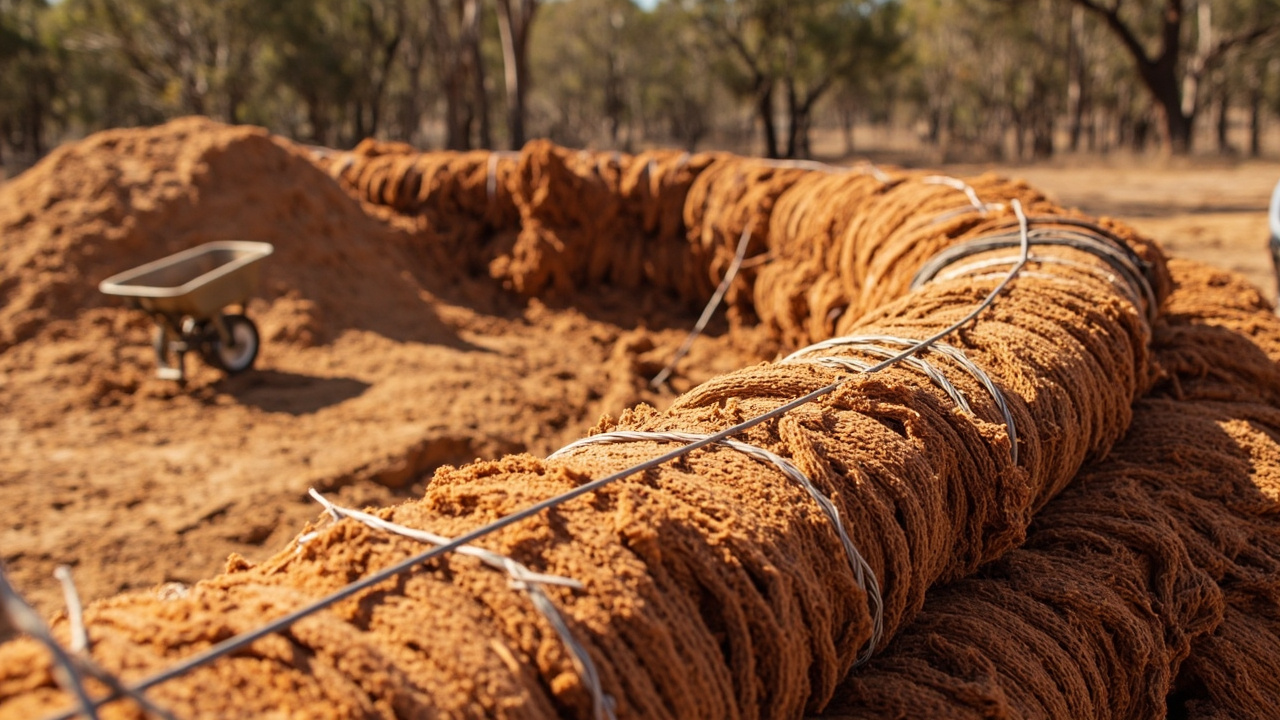
I run Superadobe with polypropylene tubing—long, soil‑filled cylinders—instead of individual bags, and I sandwich each lift with barbed wire for a mechanical lock. I've watched that combo handle emergency shelters and permanent houses across the globe.
Why I Swapped Traditional Earth Bag for Superadobe
- Traditional earth bag: Individual bags filled and stacked — good for smaller structures, garden beds, and retaining walls
- Superadobe: Long tubes continuous along a wall line — faster to lay, more structurally uniform, approved for permanent structures in some jurisdictions
Both methods work on Australian off‑grid sites. I’ve watched a heap of bags fall apart because the soil mix was too sandy, and I’ve had a council knock back a design for lacking structural certification. Superadobe is my pick for load‑bearing walls and larger structures; traditional bag methods are excellent for foundations, retaining walls, and smaller buildings.
What Dirt Works: Soil Mixes for Superadobe
What I Check in Soil
The ideal soil for earth bag building is a gravel-sand-clay mix. Too much clay and the bags swell and crack when wet; too much sand and they won't hold shape or compress properly. The sweet spot is approximately:
- 50–70% sand (provides structure and workability)
- 20–30% clay (binds the mix and provides compressive strength)
- 10–20% gravel (prevents cracking and improves drainage)
Simple jar test: Fill a clear jar 1/3 with soil, fill with water, shake, and let settle. Sand settles first (bottom), then silt, then clay (top). This gives you a rough ratio of your soil composition.
I learned the hard way near Dubbo when the council knocked back my plan and I was out $2,400 on a soil mix that flunked the jar test. No guesswork—test your site before you start building.
Polypropylene Bags
Standard woven polypropylene sacks are the go-to earth bag material—I grab mine from hardware stores, ag suppliers, or skip bin companies, whichever's closest when I need them. Make sure they're the woven type, not the smooth film stuff; the woven sacks grip the earth better and don't stretch under load.
- GSM: Minimum 100gsm (grams per square metre) for structural walls
- Size: Approximately 60cm wide when filled for standard bags; 45–50cm for Superadobe tubes
- UV resistance: Polypropylene degrades in UV — either use UV-stabilised bags or cover exposed walls with render/plaster promptly
Barbed Wire
I use 4-point barbed wire between each bag course. The barbs lock everything together—each layer grips the one below and the one above. For a 100m² wall, figure on 2–3 rolls, depending on how high you're building.
Key Tools
- Protamatic tamper or hand tamper for compacting filled bags
- Shovels and wheelbarrows for soil
- Stanley knives or sharp shears for cutting bags
- Spirit level and string line for alignment
- Bucket or scoop for measuring soil into bags
Pouring Concrete Footings After the Council Rejection
Foundation Options
A proper foundation is critical—I've seen what happens without one. Earth bag walls are load-bearing, but they rot if they get wet. In Australia, where the weather flips from dry to drenching, you've got to pick a foundation that keeps the bags high and dry. Options for Australian conditions:
Concrete Strip Footings
I set a concrete strip footing for permanent builds—at least 300mm wide x 300mm deep, running around the perimeter. It provides a moisture barrier and a level base for the first bag course. After the footing’s cured, I drive rebar pins into the concrete and into the first bag layer to lock it in.
Rammed Earth or Stone Base
Use Gravel For A Moisture Resistant Plinth
I fill the first two to four courses with gravel in larger bags instead of soil, sitting on a crushed rock levelling course—this creates a moisture‑resistant plinth that stops the damp rotting the earthbags. One client learned the lesson the hard way: he used a wet clay mix last summer, and the council tore the wall down before it was even half done.
Stepped Foundations on Slopes
Building On Slopes With Earth Bags
Australian rural properties are often sloping, so I step foundations into the slope with concrete block piers or stone and fill the gaps with soil‑bagged retaining walls—earth bag building handles sloping sites naturally, no complex formwork. I learned this the hard way on a real site in New South Wales: we mixed the soil wrong, the council rejected the plan, the wasted bags cost us three hundred dollars, and we had to start over with the right mix. Now I test the mix before I bag.
Filling, Stacking, and Compacting Earth Bags
Course 1: First Bag Row – Get It Level, Drain It Right
- Lay a layer of crushed rock or gravel (50–100mm) as a drainage bed on your prepared foundation
- Place the first course of bags/tubes filled with gravel (not soil) — this prevents moisture rising from the ground
- Compact each bag firmly using a tamper
- Ensure bags are level and aligned — use a string line along the wall face
After the First Layer: Soil‑filled Bags
- Fill bags with your tested soil-clay-sand mix (fill to approximately 75% — allow room for tying/cutting)
- Place each bag tightly against the previous one — no gaps
- Before placing the bag, lay a length of barbed wire on the course below
- After placing the bag, lay another strand of barbed wire on top of it
- Proceed to next bag, ensuring tight joins
- Once the full course is laid, tamp each bag firmly — compaction is critical for strength
Building Up
- Step back each course slightly (approximately 25mm per metre of height) to create a slight batter — this improves structural stability
- Check levels constantly with a spirit level — corrections are easy early, expensive later
- Stagger bag joints between courses — like brickwork, avoid continuous vertical joints
- For window and door openings, use temporary timber frames set in place as you build — fill bags around them
- Leave protrusions of barbed wire at corners and wall ends for joining subsequent walls
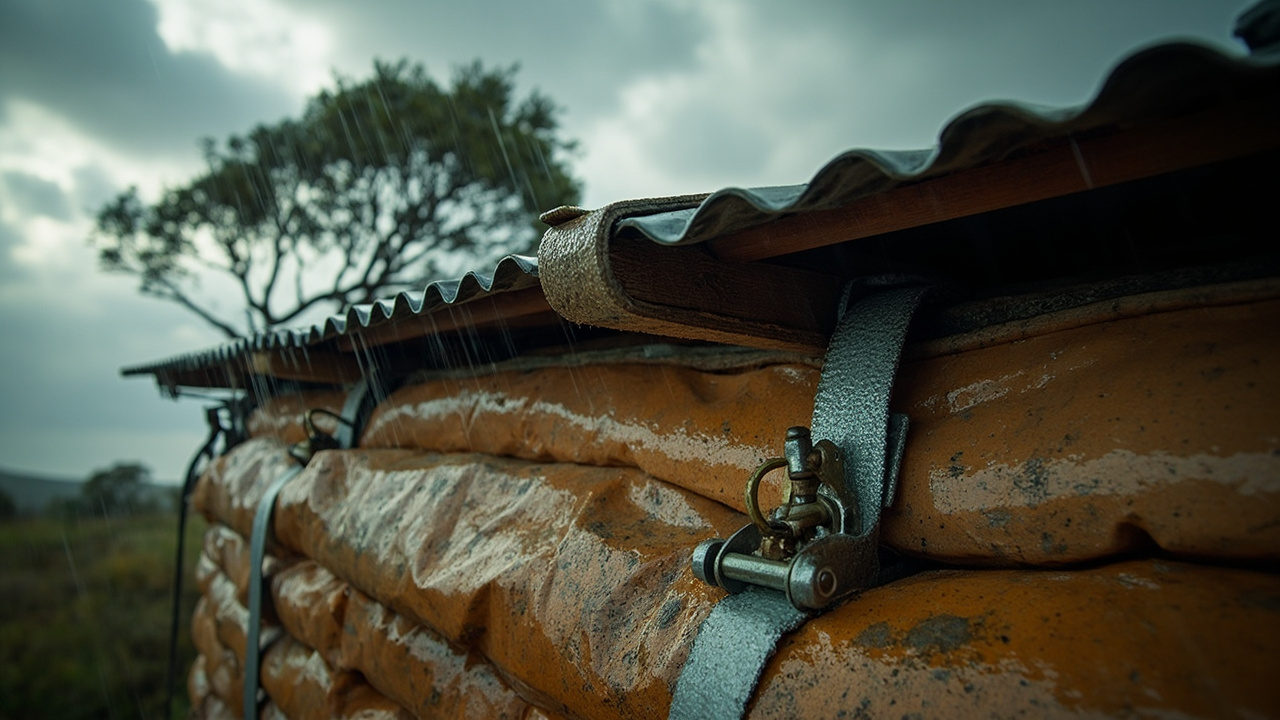
Cyclone strap anchoring roof beam to bag wall.
e-4-how-i-tie-the-roof-onto-earth-bag-walls-in-a-storm">Phase 4: How I tie the roof onto earth‑bag walls in a storm
Earth bag walls alone cannot support a roof — you need a bond beam. I always install the bond beam as soon as the bags are stacked, because it ties the whole lot together and takes the roof loads. A bond beam is a continuous structural member at the top of the walls that ties everything together and accepts roof connections.
Options include:
- Concrete bond beam: Continuous concrete lintel poured at the top of walls, with rebar projecting for roof connections
- Timber top plate: A treated pine top plate bolted through the top course of bags, with hurricane ties for rafters
- Steel ring beam: A light steel frame welded to plates set into the top bag course
I always use a timber top plate – it’s the most common approach for DIY builders and integrates easily with standard Australian roof framing.
Render and Paint the Earth Bag Shell
Raw polypropylene bags degrade in UV within months—I've watched them crumble after one summer. Exposed earth bag walls must be rendered with a protective plaster coat, or you're asking for trouble.
Interior Plaster
- Clay render: Natural clay plaster is the most breathable option — ideal for interior walls. Mix clay-rich soil with sand and straw (for fibre). Apply in 2–3 coats.
- Gypsum plaster: Conventional plaster can be used over a primer
Exterior Render
Exterior renders must be weatherproof. Options:
- Cement-lime render: 1 part cement : 1 part lime : 6 parts sand. Apply over a key coat. Most durable option in Australian conditions.
- Earth render with waterproof additive: Natural render with added pozzolan or stone dust for weather resistance
- Lime render: Traditional and breathable. Excellent in wet climates; more expensive than cement in Australia
Exterior rendering should happen as soon as possible after wall completion — ideally within 4–6 weeks, and certainly before the wet season.
Colour & Texture
Earth renders take natural pigments fine—iron oxide for reds and yellows, lamp black for dark tones—but never stir them into the final coat or the render turns to a smudge. Float, spray, or trowel textures fill micro‑gaps and improve weather resistance. I learned this the hard way near Albury when a theoretical soil mix turned to mush in the first rain; the council wouldn't even glance at the plan, and I dumped 300 bags at a cost of $1,200 before I finally got the mix right.
Council’s “heat test” for my earth‑bag cabin
Earth bag walls store heat during the day and release it after dark. That's thermal mass doing its job in Australia's climate.
- Hot-arid interior (Alice Springs, Broken Hill): Thick walls (300–400mm) dramatically reduce daytime heat gain. Night purge ventilation allows the walls to cool before the next day.
- Mediterranean (Perth, Adelaide): East and west walls benefit most from thermal mass. North-facing windows capture winter sun.
- Cool temperate (Melbourne, Hobart): Combine earth bag walls with north-facing glazing and insulation in the roof cavity for year-round comfort.
I don’t need to fire up a heater or an air‑conditioner in an earth‑bag wall; the mass keeps the interior comfortable, so my solar‑fed system runs less and I slash off‑grid energy use.
Council Rejection Over Bushfire Concerns
Earth bag walls don't burn, melt, or off-gas. We built a shed near Bendigo last winter where a neighbour's timber frame took a direct hit from the embers while the bags just sat there, though the local council nearly rejected our soil mix for lacking the right clay content. This makes them one of the most bushfire-appropriate construction methods available for Australian rural properties. Key bushfire design considerations:
- Earth bag walls meet and exceed BAL-29 requirements without additional treatment
- With cement-lime render, walls can achieve BAL-12.5 to BAL-40 ratings depending on specification
- Ensure window frames are steel or hardwood (not uPVC) in bushfire-prone areas
- Elevated decks and verandas should use steel framing or non-combustible materials
- Consider BAL-FZ (flame zone) rated shutters for windows in extreme bushfire risk areas
What 2026 Builds Cost (AUD)
- Polypropylene bags (per 100 bags): $50–$150 depending on size and supplier
- Barbed wire (per roll, 400m): $80–$150
- Soil (if purchased, per tonne): $30–$80
- Gravel for foundations (per tonne): $40–$90
- Cement-lime render (per m², supply only): $15–$30
- Timber top plate and connections: $200–$500 for a small cabin
- Concrete bond beam (if used): $300–$800
- Hire of tamper: $50–$100 per week
I’ve built earth‑bag cabins ranging from 40 m² up to 60 m², and the material bill lands between $20,000 and $50,000—before site works, services or professional fees. That’s roughly half the price of a comparable conventional build. It’s the shells you’re paying for, nothing more.
How I got the council to sign off on my earth‑bag build
Building approval for earth bag homes varies by state and council:
- NSW: Complying development possible for single-storey structures under 25m²; full DA required for larger buildings
- Queensland: Accepts earth bag construction under the National Construction Code (NCC); check council requirements for siting andbushfire mapping
- Victoria: Subject to local council planning scheme; earth bag is classified as "earth construction" under the NCC
- South Australia, WA, NT: Generally accepted under standard building approval frameworks
I get a building designer or architect who's worked with alternative methods onto the job from day one. They handle the council paperwork and make sure the structural engineering doesn't fall over.
I signed up for a TAFE owner‑builder ticket before laying a single bag of earth; TAFE and private providers run short courses in most states, and the fee is money well spent for anyone tackling an off‑grid earth‑bag build.
Conclusion
Earth bag building isn't a compromise; it's a genuinely superior approach for many Australian off-grid scenarios. I tried a generic soil mix once at a site near Ballarat, and the bags burst on the first heavy rain because the clay content was off. That's why the combination of thermal mass, fire resistance, pest immunity, and minimal material cost makes it ideally suited to the realities of rural Australian property ownership, especially when a council in regional Victoria rejects your plans for standard timber construction.
Soil Testing And Foundation Planning
A mix of clay and sand fails the jar test; I lost three hundred and fifty dollars in bags and the City of Greater Bendigo flatly rejected the plan. After that I made sure the soil was right, the compaction was solid, the walls stayed dry with a proper foundation and render, and I gave the council enough time to do its job. The house you build will outlast you, built from bags filled from your own land.
Build wisely, build naturally.
Worth a watch: First TRUE Earthbags? Day 2 Building a Superadobe Dome Home · Tiny Shiny Home
Frequently asked questions
Are earth bag homes safe in Australian bushfire zones?
It's honestly the first question every Aussie asks, and it's exactly what my council kicked back at me on the first go. The render coat and the sheer mass of the walls buy you real fire resistance — it's not like a timber frame that'll go up in flames. Get the render right, and the wall is what stands between you and the fire front.
How do you get council approval for an earth bag house?
Mine got knocked back the first time, so I ended up pouring proper concrete footings and resubmitting the whole thing. You've got to show the certifier that the walls tick the boxes on the stuff they care about — structural, fire, and thermal. Keep tidy records of your soil mix, your bags, and how you compacted them and the process goes a lot smoother.
What sort of soil do you need for earth bag building?
You want a blend that has clay, silt, and sand in it — pure sand won't bond and pure clay just cracks. I dig mine straight from the building site and test a few handfuls with water before I commit to a whole wall. The bag is only the form, the dirt is the wall, so this is the part you don't want to muck up.
Do earth bag homes get too hot in Australian summer?
No, and that's exactly why my council made me put the cabin through their heat test before they'd sign off. All that packed earth acts as thermal mass — it soaks up the heat through the day and lets it go at night, which evens out the temperature inside. Once the render and roof are on properly, you don't need much else to keep it comfortable.
Disclosure: some links in this article are affiliate links. If you buy through them we may earn a small commission at no extra cost to you.