Off-Grid Furniture: Build It Right, Skip the Bullsh*t
By Mick O'Brien· carpenter & builder · sheds-to-homes, cabins and things that stay up in a storm
By Mick O'Brien · carpenter & builder · sheds-to-homes, cabins and things that stay up in a storm
I build furniture the way I frame a bush pole shed: over-engineered, from what’s to hand, and finished before the next southerly buster hits. In my paddock workshop outside Braidwood, a workbench starts with 200x50mm recycled ironbark sleepers picked up from a demolition yard in Queanbeyan for $8 a lineal metre. You lose a circular saw blade per three metres, but the weight stops the bench walking when you’re planing spotted gum.
Hand Tools And Bolted Joinery
Off-grid means no thicknesser whining for an hour; I use a Stanley No. 7 jointer plane, secondhand for $120 at the Bungendore markets, and a couple of winding sticks ripped from a pallet. For knockdown joinery that won’t loosen after a summer of dust and a winter of condensation, I bolt legs with M12 galvanised cuphead bolts through 19mm ply gussets – the ply offcuts from a Bunnings 2400x1200 sheet of 17mm F17 formply, which ran me $62 last month.
Choosing The Right Glue
Glue is crosslinked PVA, Titebond III, because standard Aquadhere re-emulsifies in the humidity you get inside a shipping container studio when the morning fog sits in the valley. Sanding is by hand with 80 grit Hermes cloth-backed paper cut from a roll; a 50-metre roll costs $110 and lasts longer than three boxes of discs in a random orbital that drains the batteries. Once the frame is together, I flood the end grain with boiled linseed oil thinned 50/50 with mineral turpentine, then wax with a block of beeswax from a local apiarist at $15 a bar.
Warm And Versatile Off-Grid Furniture
The finish feels warm in winter and doesn’t off-gas when the wood stove brings the room to 30 degrees. This is furniture that handles a dirt floor then moves to a polished slab without apology.
Secure Benches With Concrete
Lost three benches off the shearing-shed veranda in one August westerly. The 12mm galvanised bolts holding the jarrah slab frames to the posts sheared clean at the nuts — not pulled out, snapped. Cost me about $140 in timber and a full day’s labour. I’d simply driven the posts into paddock dirt and called it good. After that, every outdoor bench gets bolted to a concrete pad. A $9 bag of Rapid Set from the local hardware, poured into a 200mm-deep hole with a galvanised stirrup cast in place, gives you a 20 kg anchor that wind can’t lift. I run a 12mm Dynabolt through the stirrup into the bench leg now. No more airborne seating.
Most off-grid builds out past Longreach start with whatever timber stack is on hand—old fence posts, a few lengths of 90×45mm framing pine, a couple of sheets of 17mm formply left over from a shed job. A bed frame I knocked together from salvaged 4×2 hardwood and M12 coach screws has ridden out three cyclones without a creak, while the flat-pack version the owners brought in ended up in the neighbour’s dam. The difference isn’t fancy joinery. A cross-brace at one-third leg height stops racking; M10 bolts with nyloc nuts won’t back out after a day of 120 km/h gusts.
Essential Tools And Materials
A tube of exterior PVA costs about $12, a box of 100 75mm bugle batten screws maybe $18. A circular saw, a cordless drill, a square, and a pair of sawhorses are all the workshop you need.
Design: Keep It Stupid Simple
Don't over-engineer. If it needs to hold a coffee cup, it's over-engineered. Off-grid means no spare parts, no time for fixes. Design for function, not Instagram.
Measure twice, cut once – Seriously. That rule wasn’t written for furniture makers who work in climate-controlled sheds; it was written for blokes standing in a paddock with a cordless circular saw and a sheet of 2400x1200mm ply that cost $65. The moment you skip the second measure, you turn a straight 90x45mm MGP10 stud into a three-buck piece of kindling.
Start with the space. A 1.8m bed that’s 20cm too short isn’t a design choice, it’s a mistake you sleep next to on the floor. Standard Australian queen mattresses run 2030mm long; cut your bed rails to 1.8m and you’ve built a 230mm overhang that dumps the mattress—and you—onto the floorboards at 2 a.m. Same goes for tables: a 900mm-high workbench feels right until you stand at it for three hours, then the ache between your shoulder blades tells you your elbow height needed 1050mm. Measure the mattress, the doorway it has to fit through, and your own standing reach. I keep a battered 8m Lufkin tape clipped to my belt, not the $2 special that kinks at the 2m mark. Hook the end on the far edge, pull taut, read the number where the blade leaves the body. Do it twice. If it doesn’t match
Use what’s local, because a $50 stool built from new store-bought timber will almost always be chipboard and cam-locks that wobble inside a month. If you’re in the bush, fallen ironbark or stringybark lying beyond the fenceline costs you nothing but sweat and diesel for the chainsaw. Green timber that has been down for less than a year is still dripping with bound moisture — cutting a 300 × 300 mm seat blank from it today guarantees cupping, end-splits and a leg that loosens after the first hot north-westerly. Stack it off the ground with sticks between the slabs, under a tin roof, and leave it for at least one full dry season. A piece that rings when you rap it with a knuckle is ready. If you’re near a city, hit a second-hand shop. Vinnies, Salvos and the local tip shop routinely price solid hardwood bed slats, old pine drawers and jarrah fence palings below ten bucks. One dismantled queen-size bed frame will often give you enough dressed hardwood for three stools, with the headboard becoming seat blanks if you dock around the old mortises. Council transfer stations in outer suburbs charge a flat fee per bootload — you can walk out with a stack of dry, straight-grained redgum offcuts for the price of a coffee. A weathered redgum sleeper from a landscape yard’s discard pile might cost five dollars and holds far more character than anything kiln-dried and pre-packed. Turn that sleeper into a 380 mm‑high stool with a 35 mm‑thick seat, four legs ripped to 45 × 45 mm with a slight two-degree outward splay on the bottoms so it sits dead flat on a paddock slab, and the only cash outlay is a dozen 8 g × 40 mm bugle-head screws and a smear of crosslinking PVA — about four dollars all up. The same stool bought new for $50
Modular is king.
I’ve got a table out in the shearing-shed kitchen that drops from dining height to a spare bunk. It began as a single 2400×1200 sheet of 17mm F17 structural ply—$90 at the Dubbo hardware back in June. Cut the top to 1900×750 so it can still clear the wall when lowered. The underside is framed with 90×45 MGP10 pine laid flat
Pro Tip: Sketch it on a beer mat. If you can't draw it in 30 seconds, it's too complicated. Off-grid isn't the time for "creative" designs.
Joinery: No Fancy Glue, Just Strong
In ground-contact situations, a wedged through-tenon cut from air-dried ironbark will still move more than the 6mm coach bolt holding a 90×45 treated-pine seat rail to a 100×100 post. I keep a tin of M12×130 hot-dip galvanised cup-head bolts and square washers—$2.80 each in a box of 50 from the Moora Rural Traders. The extra 2mm clearance hole gives the timber room to shrink and swell across the grain without chewing up the fastener, and the square washer bites into the face better than a round one once you’ve belted it home with an old marlin spike.
Steel And Oversized H
For outdoor tables left out through a wet Kimberley build-up, I stopped cutting housings altogether and just run two 75mm batten screws toe-nailed from underneath at 15 degrees, paired with a smear of Titebond III under the board ends; after three flood seasons, not a single lifted slat. Mortise-and-tenon is for indoor pieces built in a humidity-controlled shed. In a paddock, steel and oversized holes beat fancy joinery every time.
Butt joints and screws are the workhorse. In my yard, I reach for 60mm stainless steel screws (8g | 10g) any time a leg meets a rail. A box of 100 316-grade 8g x 60mm screws costs between $18 and $25 at country hardware, and that $10 saving over galvanised stops looking clever the first wet winter when black rust streaks bleed into the timber. Drill a 3.5 mm pilot hole through both pieces — especially if you’re working with dense messmate or ironbark offcuts — because driving without it will split the end grain or snap a screw halfway in. On a 500 mm table, four screws per leg does the job; align the heads flush and the joint stays tight long after the quick-fix jigs have wobbled loose.
Titebond III, available at Bunnings for $15 for 300ml, is the glue to reach for. It’s waterproof and Australian-made, so it won’t turn to mush in humidity the way standard PVA does after a few wet seasons in a shed with tin walls. I glued up a set of spotted-gum outdoor stools in 2018 and left one out by the chook run as a test. Years of rain, 40-degree days, and chook-shit moisture haven’t lifted a joint. The cause-and-effect here is simple: once it cures, that bond is stronger than the lignin in the timber itself — standard test sticks snapped from the timber, not the glue line.
Clamp for 24 hours. Not overnight when you knock off at six and front up at six the next morning. A full 24. In a Brisbane summer shed, the glue skins over faster — about 8 minutes open time — so you spread it thin with a flux brush, not a finger. For 19mm stock, run a clamp every 250mm to squeeze a fine bead of glue out both sides. I use ¾-inch pipe clamps because the cheap quick-grip sash cramps twist under load and leave you with a bowed panel you’ll be planing flat for another hour. Wipe the squeeze-out with a damp rag before it gels, or it’ll show up under finish like a scar. After 24 hours, unclamp and the panel stays flat; skip the wait and you’ll chase creeping joints forever.
Nails are a poor choice for off-grid furniture because Australian hardwoods—spotted gum, ironbark, stringybark—have a habit of spitting them back out. The timber moves with heat and humidity. A nail has no thread, so it relies on friction. Once that friction breaks, the nail works loose. Then there’s the rust. Even hot-dipped galvanised nails will eventually sacrifice their coating in tannin-rich timbers like red gum, leaving a black stain and a nail that snaps if you try to pull it. I’ve dug enough bent, corroded nails out of old floorboards to know they’ll fail.
Screws cost more per fastener, but they save the piece of furniture. At my bench, I keep a 100-pack of 14g bugle batten screws in the 80mm length for chair seats. That’s around $18 at any hardware chain. The coarse thread bites deep, and the bugle head pulls itself flush without chewing the timber if you pre-drill. For a seat spanning two side rails, I drill a 5mm clearance hole through the seat board and a 4mm pilot into the rail. A dab of exterior PVA or Type III crosslinking glue on the joint before driving the screw will stop the glue line creeping apart years later. Then run the screw in with an impact driver—hex bit, not Phillips—and the torque seats it home without camming out.
If you’re building a chair, use 80mm screws for the seat. That length gives you roughly 40mm of thread in the rail after passing through a 40mm-thick slab. Less thread depth and the joint will rack loose under a shifting weight. Nails won’t give you that clamping pressure, and they’ll start complaining the first dry summer. Screws let the timber move as a unit rather than fight each other.
Bunnings (all locations)
- Stainless steel screws (400mm pack): $12
- Titebond III glue: $15 Tip: Buy a 500mm pack of screws. You'll use them for everything.
Finishes: Protect It or Lose It
Painting or staining isn’t optional. Australian sun, salt air, and humidity will eat through bare wood in weeks. I’ve set up in paddocks from the Atherton Tablelands down to Gippsland, and a stick of untreated radiata or blackbutt left out in full UV can start cupping and checking before the fortnight’s out. Timber hits equilibrium moisture content fast here—often cycling between 10% and 18% in a single week outdoors—and that movement snaps open end grain like a split boot heel.
Seal All Six Sides Before Dew
If you’re building a hardwood outdoor table or a set of cypress bench seats, you need to seal all six sides, and you need to do it before the first dewy morning. Standard practice is to sand to 120 grit, wipe off the dust with mineral turps, and coat where the timber will live—not inside an air-conditioned shed—so the pores are open to whatever weather it’ll face. End grain soaks up finish like a dry creek bed; I flood it until it won’t take any more, then lay on a full final coat across the whole piece.
Costs For Oil Decking Finishes
Common oil-based decking finishes like Cutek CD50 or Intergrain UltraDeck run about $55 to $65 per litre at the hardware, and a litre covers roughly 6 to 10 square metres per coat depending on the timber’s thirst. A typical two-seat outdoor bench might cost $25 to $35 in product to treat properly. Spot repairs or a quick recoat every 12 to 18 months keep the film from peeling, and that’s still cheaper than building the thing twice. Do it right or do it again.
Oil is best – Teak oil (like Osmo or Tung oil) for outdoor stuff. $25 for 500ml at Bunnings. Apply with a rag, let dry 24hrs. Reapply every 6 months.
For indoor: Shellac – Cheap, fast-drying, and waterproof. $12 for 500ml at Bunnings. Brush on, let dry, sand lightly, repeat. Two coats.
NO varnish. It peels in the sun — the UV hardens the resin until it cracks, then moisture gets under the edges and lifts whole sheets off the surface. You’ll be scraping it off in 6 months. I’ve spent February afternoons with a heat gun and a floor scraper cleaning up a neighbour’s merbau bench he’d coated with a two-pack marine finish. Ninety bucks for a 1L kit from a chandlery down in Port Adelaide, three coats, looked like glass on Australia Day. By Queen’s Birthday it was curling like dried gum leaves. Waste of money.
Standard spar varnish runs about $40–$50 a litre at any big green shed. It sits on top of the timber, flexes too much in 40-degree heat, then sets brittle overnight. Out past Mudgee, where there’s no shade and the dew point drops hard, you can hear the stuff crack. Once water gets under the film, rot starts where you can’t see it. Scraping it back to bare wood costs you a full day’s labour and a box of 40-grit discs, and you’re back to square one.
Better to skip the film finish entirely. Hard burnishing oil straight onto spotted gum costs about the same per litre — Organoil or Whittle Waxes hardwax oil run $45–$55 at specialist woodworking suppliers like Carbatec or Timbecon. You apply it with a red scouring pad, let it set, buff with a cotton wheel. It soaks in, seals the pores, and doesn’t form a skin that can peel. It weathers to a silver-grey in two summers, but a quick rub with fine steel wool and a fresh coat soaks straight in. No scraping, no heat gun, no hillbilly bonfire of varnish flakes in the paddock.
Woodcraft (online, ships Australia)
- Osmo Teak Oil (500ml): $28
- Zinsser Shellac (500ml): $14 Tip: Buy shellac for indoor, teak oil for outdoor. No need for both.
Final Word: If you're spending more than $50 on a stool, you're doing it wrong. Build it to last 5 years, not 50. Off-grid isn't about luxury – it's about getting through the next storm. Get your hands dirty, skip the fancy stuff, and build something that works.
When to Call a Professional
I charge $880 to build a solid messmate dining table that’ll see out a cyclone. The sparky charged my neighbour $1,200 to wire his off-grid shed because he’d already buried the conduit himself across 40 metres of paddock. Licensed trade boundaries catch blokes out. Any 240-volt fixed wiring, even a single GPO on a stud in a shack, legally needs a licensed electrician in every state. A clean 12-volt system with fuses and a busbar, that’s different—you can run lights and pumps yourself if you follow the Australian Wiring Rules intent.
Inverter Connections Can Kill
The trick is the inverter: the moment AC leaves that box, you stop. Loose DC connections smoulder; loose AC connections kill. I’ve peeled back burnt ply on a battery box where a bloke used household flex instead of 35mm² welding cable. The cable cost him $18 a metre. The repair cost him the whole battery bank. Plumbing and gas are similarly blunt. Any LPG fitting from a bottle to a cooktop or hot water unit requires a licensed gasfitter and a compliance certificate.
Secure Gas Bottle Installation
A 45kg gas bottle sitting outside a bush kitchen needs a concrete pad and two chains, not just a star picket and hope. I pay a gasfitter $400 and a carton of Great Northern to run copper from a bottle through a wall, test it with manometer, and leave me the certificate. The alternative is an insurance assessor pointing at a burnt stub wall and walking back to his LandCruiser. Structural work blurs the line smartly. Building a workbench or a bed frame is joinery. Cutting a 2-metre opening in a load-bearing wall of a relocated miner’s cottage is not.
Inspect Rot And Engineer Plans
I use a $60 moisture meter on old hardwood stumps before I bolt anything to them, because dry rot at the base of a 100-year-old red gum post looks solid until the morning you find the roof sitting on the fence. For anything holding a roof or a mezzanine floor, an engineer’s site inspection costs $700–$1,100 in central Victoria, and their signed drawing is cheaper than a failed council audit. Concrete footings have a habit of exposing overconfidence.
Reactive Clay Requires Deep Footings
Eight bags of 20kg general-purpose mix from the hardware won’t anchor a shed in reactive clay that moves 40mm between wet and dry seasons. A proper 450mm-deep pad footing with M20 rebar cage for a wind-rated shed upright will cost $45 in materials per hole, using 25MPa pre-mix from a local plant. Digging the hole by hand in ironstone country takes a day and a borrowed jackhammer. Call a concreter if you want the slab flat enough to sweep, because a 100mm slab that ponds water leads to a floor that rots from the edges inward.
My Essential Tools And Prices
Specific products and prices from my ute and workshop: a Fluke T5-600 multimeter runs $230 and has saved me from guessing on solar strings; a 200-amp Victron SmartShunt costs $180 and stops you murdering batteries; an Ozito 185mm circular saw for $79 will build twenty pieces of furniture before it begs for a new blade. In contrast, a hired 300mm drop saw for a weekend from a tool library or a hire joint will be roughly $60, and the accuracy is worth it when cutting eight 90×45 MGP10 pine studs for a cabin frame.
Essential Fire Safety Gear
I keep a 2kg Dattner fire extinguisher in the workshop and another near the battery bank. They cost $55 each and are required by the CFA for any shed with a combustion appliance. Last winter a mate’s potbelly stove chimney fire went from a dull roar to a column of flame in the time it took to find a beat-up extinguisher with the needle in the red. The double-skin flue kit he didn’t buy costs $380 a metre from places like BBQ Spit Rotisseries
Any off-grid furniture that needs more than a 12V DC LED strip or a USB socket fed from a small battery is no longer a weekend fiddle. Under AS/NZS 3000, running 240V wiring—even a single GPO inside a kitchen cabinet—requires a licensed electrician. I’ve pulled apart a mate’s bush-kitchen bench to find a standard extension lead hardwired into the back of a cheap power point, taped up with electrical tape that had gone sticky in the heat. The only thing that saved the shed was the fact the inverter kept tripping. A sparky out here charges a call-out of $120–$150 and roughly $90–$110 an hour; the job will come with a Certificate of Compliance, which your insurer actually wants to see if a fire starts behind your joinery. Low-voltage DC stuff you can handle yourself—solder your 12V DC strip to a fused circuit and keep connections inside proper junction boxes, not twisted under a drawer. The moment you tap into mains or an inverter’s 240V output, the law says you stop.
Structural modifications to buildings or load‑bearing elements
Hacking into a timber wall frame without knowing what is holding up the roof puts the entire structure in play. In Australian stick framing, a typical interior stud is 90×45 MGP10 pine spaced at 450 mm or 600 mm centres. That stud alone can carry a stiff drink but not a new doorway. Removing one to widen an opening without a lintel to pick up the load above will transfer ceiling weight straight onto the plasterboard, cracking cornices first, then sagging the top plate. A standard lintel for an opening up to 1200 mm in a single‑storey house uses two 90×45 MGP12 members nailed together, bedded on trimmers and packed level. At any hardware chain a 90×45 MGP12 is running about $8 a lineal metre, so a basic lintel costs under thirty bucks. Cheap insurance.
Floor loads trip people up just as often. Joist sizes follow AS 1684 span tables. A
Gas line installation or modification
Solar array installations above safe voltage thresholds
If you bolt a new verandah seat to the house, you’re changing the load path. Under the National Construction Code (NCC), that’s structural work. Plain and simple. I once propped a 3.6-metre-long Blackbutt bench off the northern wall of a shed at Braidwood. The engineer made me lag it to bearers, not just the weatherboards, because wind uplift in that valley can hit 1.5 kPa. Cost me $220 for the signed letter, and another $180 for the M12 hot-dipped gal coach screws, washers, and a tube of Bostik Seal’n’Flex. Money well spent.
Internal stuff is trickier than it looks. A floor-to-ceiling bookcase that’s fixed top and bottom becomes a shear brace whether you meant it to or not. If it runs parallel with the joists, a 2.4-metre unit full of paperbacks adds around 130 kilograms dead load concentrated on maybe two joists. Standard bearers at 450 centres will deflect more than L/300 and you’ll feel the bounce. The fix isn’t fancy: sister the joists with seasoned LVL offcuts from the nearest truss plant, glued and coach-bolted at 300 intervals. Last time I did that, an offcut pack from Dahlsens set me back $60.
Freestanding pieces that just lean against a wall aren’t exempt if they’re heavy enough to pull the frame out of plumb during a storm. A mate’s tallboy in a fibro weekender near Gundagai shifted 40 millimetres in a southerly buster, cracking the cornice and popping the plasterboard tape. He’d anchored it with two 6-gauge screws into the stud. On my own job, I use Ramset Nylon Wallmates into the noggin, not the stud face, so the fixing isn’t trying to pull out under racking. A pack of ten costs $4.80 from the big green shed.
If you’re pouring a concrete bench top inside a pole home, the extra dead load can compress the stumps unevenly. Standard C20 concrete at 50 millimetres thick weighs roughly 120 kilograms per square metre. I spec C25 with a 60-millimetre minimum thickness and always check the stump spacing against the original engineer’s assumptions. I’ve seen a nice recycled messmate slab crack clean through because the edge stump sank 8 millimetres after a wet spring. Cheaper to buy a $35 soil probe and check the reactive clay depth before you start mixing.
Always check local regulations and obtain necessary permits before commencing work. In my part of Victoria, a carport under 20m² attached to an existing dwelling can slide through as an exempt development, but tip over that size and a building permit runs $800 to $1,200 with a private certifier, plus a two-week paperwork shuffle. I once watched a bloke in the Mallee argue for three months with council over whether his chook shed counted as a farm building or a dwelling because it had a bar fridge and a camp stretcher.
Permits Cost More Than You Think
The cause was a missing planning permit; the effect was a stop-work order and a $2,000 retrospective-approval fee bolted onto an engineer’s report he never budgeted for. Standard practice: a 12m² garden shed on a slab in many Brisbane suburbs needs a planning permit if any wall sits within 900mm of a side boundary, and that application alone can add $400. The Building Code of Australia sets minimum footing depths by soil classification—H-class reactive clay around Toowoomba often requires 450mm-deep bored piers, so a guess-and-go slab cracks within two summers.
Council Tax For Bushfire Compliance
I keep the current local planning scheme on the ute dashboard and add a flat $1,500 to every quote for paperwork and inspections, which I call the council tax: not the rates, just the privilege of being told you cannot use secondhand zincalume because the site sits in a mapped bushfire attack level. On a BAL-29 shed, that single rating can tack on $3,000 in ember-proof mesh, bronze wool, and tighter framing tolerances before the first sheet goes up. No shortcut erases that cost.
He walks through assembling a tower with basic timber and hardware, showing how the joints and bracing keep the whole thing from swaying—useful for anyone figuring out how to frame a sturdy shed or cabin on a budget.— Mick O'Brien
Frequently asked questions
Why does my timber furniture crack when the weather changes?
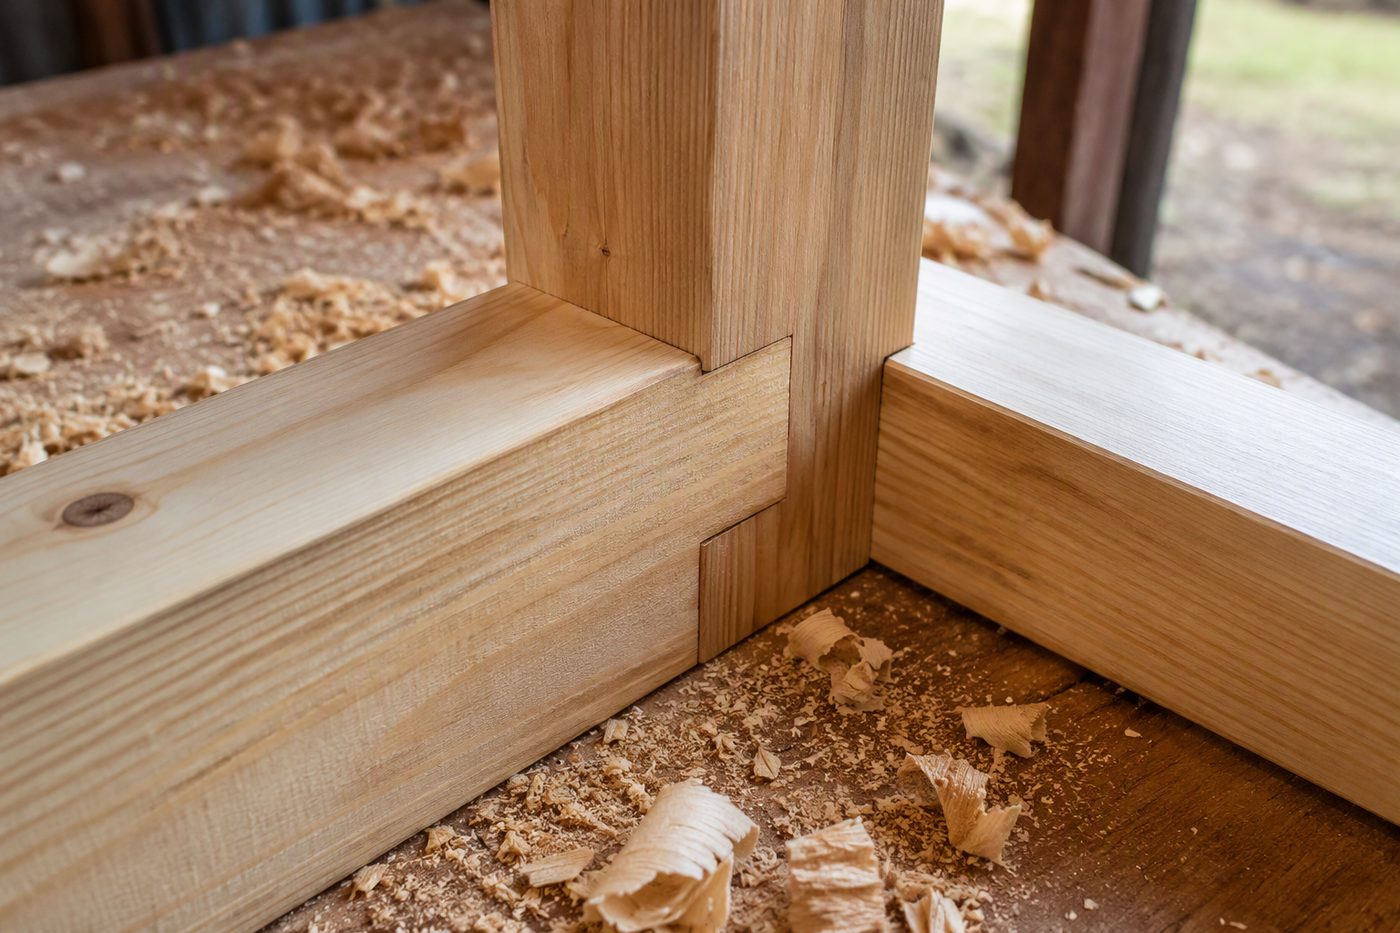
Timber moves with temperature and humidity. Out in my workshop, a 45°C day can drop 20 degrees in an hour when a cool change comes through, and those boards will shift on you. If your joinery hasn't allowed for that seasonal movement across a wide benchtop, the glue line or the wood itself will split. I build with housed mortise-and-tenons so the frame can handle the stress without blowing apart.
Can I use structural pine for furniture or is it rubbish?
It's the cheapest framing timber at the big green shed, and yeah, it twists if you look at it wrong. I sort through the pallet for quartersawn boards and sticker them under a lean-to for at least six weeks in the same moisture conditions as where the finished piece will live. Pick well, dry it properly, and it'll do the job without ending up as firewood.
What's the strongest joint for a handmade table?
Housed mortise-and-tenon, full stop. It locks the leg into the rail with mechanical grip, so the carcass can't rack when someone leans on a corner. A butt joint held with screws and glue might look square on day one, but it'll wobble within a year in a climate that swings like ours.
What finish should I put on a timber benchtop?
Water-cured polyurethane with UV inhibitors, three coats. I scuff between every coat with 240-grit and wipe with a tack rag — no exceptions. The hard cure beads up spills like a spilled billy of tea, and the UV blockers stop the honey colour turning to grey ash inside a couple of summers in the sun.