Composting on Twelve Acres in Tassie: Hot Piles, Worm Farms and a $100 Three-Bay Build
Off-grid composting in Tasmania: hot versus cold piles, a three-bay pallet build under $100, worm farms from AUD $80, and the mistakes that turned my first heap to slime.

By Fiona Gallagher · permaculture designer · food, animals and preservation on 12 acres in Tassie
“My first compost heap on our Tasmanian farm failed because I ignored the 30:1 carbon-to-nitrogen ratio, turning my manure into a sludge that smelled worse than the rotting apples I'd ignored.”
On a twelve-acre block in Tassie, everything eats everything else. The kitchen scraps, the chook manure, the tomato vines I rip out in March — all of it goes back into the ground instead of into a bin the council hauls away. We already grow the food, run the solar, catch the rain. Skipping compost would be the one loose thread in the whole setup.
Twelve acres in Tassie throws up an absurd amount of compostables. The kitchen drops 2–3kg of food waste a week straight onto the heap. Chicken manure goes in too, but only once it's been properly composted first. Prunings, leaf litter, straw bedding from the chook pens, flattened cardboard — it all piles up and breaks down into a soil that bought fertiliser can't touch.
Key Considerations for a Tassie Compost Setup
Hot pile when I need it in weeks, cold pile when I don't
Hot composting is what I run for the kitchen waste where pathogen destruction matters. The pile needs to sit between 55–70°C, which means I'm managing moisture, carbon-to-nitrogen ratio and oxygen by hand. Done properly, the heap finishes in 4–8 weeks. Done lazily, it's a slimy mess — and that's exactly how my first heap died. I left it wet, ignored the ratio, and came back to anaerobic sludge that smelled worse than the rotting apples I'd tossed in.
Cold composting is the other heap. I dump garden waste into a bay out the back and let it rot at its own pace over 6–18 months. No turning, no monitoring. It doesn't reach temperatures high enough to kill weed seeds or pathogens, so I keep anything dodgy out of it and use it for the orchard and the perennials where it doesn't matter if a few seeds survive.
Managing three waste streams
I run both methods because the place produces three different waste streams: food from the kitchen, waste from the animals, and the overflow from preservation days when I'm bottling tomatoes or dealing with a glut of fruit. The hot bin handles the kitchen waste, which may include pathogens and should be processed thoroughly. The cold piles take the bulk garden material, which doesn't need the same pathogen guarantees. Animal manure goes through the hot bin before it touches the vegetable beds.
How I get compost to 60°C in a Tassie frost
Out here on 12 acres in Tassie, the pile runs on what the microbes can do. When steam rises off it on a frosty morning, I know they're firing — then I check the heat through the fork handle and turn the lot the moment the temperature stalls.
Mesophilic phase (15–40°C) is the warm-up. Initial breakdown by moderate-temperature bacteria and fungi, pile begins to warm. Thermophilic phase (40–70°C) is where the high-temperature bacteria dominate, breaking down proteins, fats and complex carbohydrates rapidly. Pathogen destruction happens here. Most weed seeds and fly eggs are destroyed above 55°C. Cooling and maturation phase is where temperatures drop, mesophilic organisms return to finish the job, and fungi colonise to create stable humus.
Stick a long-probe thermometer straight into the heap's core. Nothing else gives me a reliable read on progress or tells me whether the pathogens are actually dead.
Aiming for a 30:1 carbon-to-nitrogen ratio
Target ratio: 25–30:1 — twenty-five to thirty parts carbon to one part nitrogen by weight. That's the band bacteria need to do their job. Browns down first: dried leaves, straw, cardboard, sawdust, woodchips. Greens on top: kitchen scraps, fresh grass clippings, chicken manure, coffee grounds.
On my 12-acre block in Tassie I run three parts browns to one part greens by volume. Push the nitrogen too hard and the heap goes anaerobic, foul, slimy. Run too rich on carbon and decomposition stalls. A working heap smells earthy and clean. Catch a sharp ammonia whiff and the greens have won. End up with something bone-dry and lifeless and the browns have taken over.
Last winter I let moisture slip. The pile froze solid, turned into a stinking anaerobic sludge, and took a solid month of turning and watering before it started working again.
Worm Farming in a Wet Tassie Winter
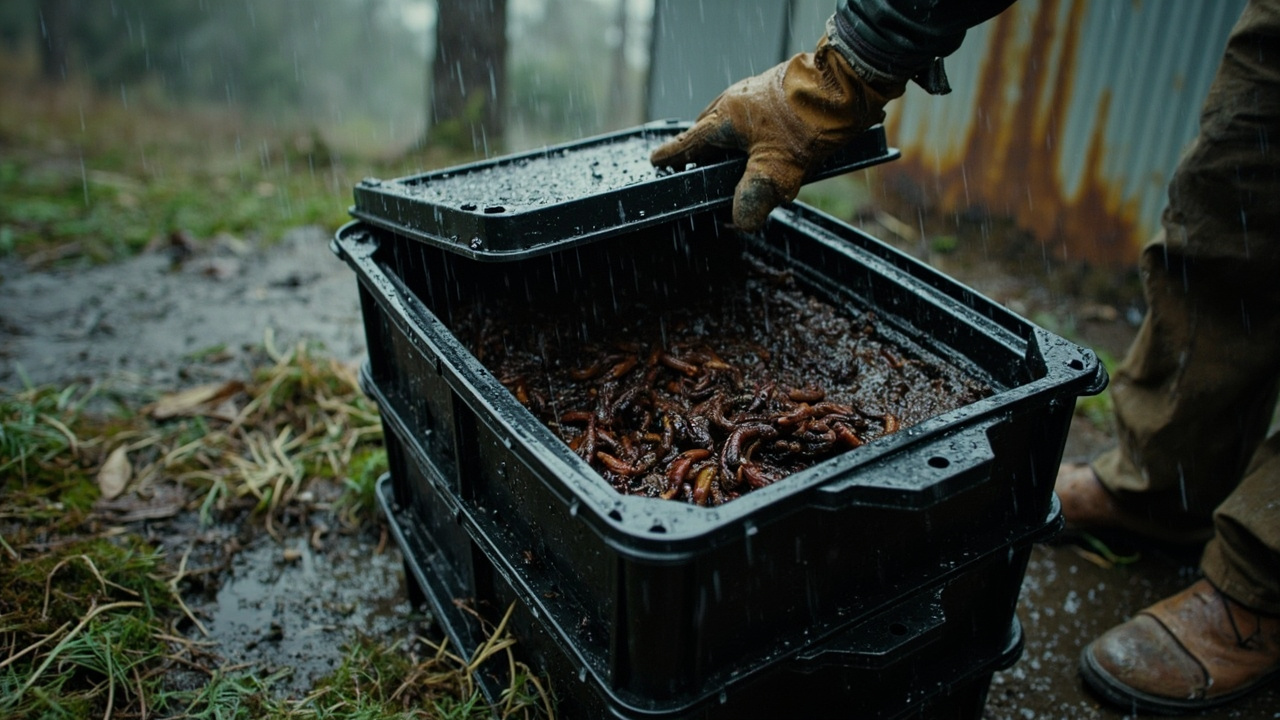
Vermicompost earns its place on my 12 acres in Tassie. The castings hold five times the available nitrogen, seven times the phosphorus, and eleven times the potassium of the surrounding topsoil, feeding my container gardens, raised beds, and small-scale food production. I learned that the hard way: moisture control is non-negotiable. Get it wrong and you'll have a slimy mess on your hands.
Stocking your Australian worm farm
Australian Red Wigglers (Eisenia fetida) pull the weight here. Rural produce suppliers and local worm farms stock them, and a basic worm farm will set you back AUD $80 to $300 — though half my bins are old plastic containers with a few sheets of cardboard tossed in. Bedding damp like a wrung-out sponge, a steady mix of kitchen scraps and shredded paper, temperature between 15 and 25°C. Get any of that wrong and the worms head for the hills.
- Moisture: Worm bedding should feel like a wrung-out sponge — moist but not dripping.
- Temperature: Red wigglers thrive between 15–25°C. In Australian summers, worm farms need shade and insulation from radiant heat; in winter they may need covering in cold climates.
- Feeding: Bury food scraps under bedding every few days. Avoid citrus, onions, and spicy foods in large quantities.
- Harvesting: Move finished compost to one side, add fresh bedding and food to the other side. Worms migrate toward food over 1–2 weeks, leaving finished castings for harvesting.
Stacking the First Piles: Bins and Tumblers on the Block
Two systems run side by side on my place. Kitchen scraps go in the hot bin — breaks down fast. Garden material gets chucked in the larger cold-compost bay out the back and rots down slow, takes as long as it takes.
The tumbler that went slimy
I ran a tumbler for a season and won't go back. Tumbler composters are sealed drums mounted on a frame that can be rotated to aerate the compost. They offer excellent rodent resistance, faster composting due to better aeration, and neat appearance. They're ideal for smaller properties or those close to neighbours where aesthetics matter. However, tumblers have limited capacity and can be difficult to empty. Mine overloaded, the drainage plugged, and the whole thing went anaerobic inside the drum.
Bay systems vs tumblers
Bay systems (also called bins or cold-frame composters) use stationary, open-bottom bays or bins. They handle large volumes of material efficiently and are well-suited to properties generating significant garden waste and animal manures. Bay systems require manual turning with a fork, which is more labour-intensive but allows you to work with larger quantities. For serious off-grid food production, a three-bay system allows continuous composting with material at various stages simultaneously.
Setting up the bays
- Choose a location: Ideally partial shade (prevents drying in summer, allows warming in winter), reasonably close to the house for kitchen scraps, and accessible for wheelbarrows. Avoid low-lying areas that flood.
- Set up your first bay or tumbler: If building a bay system, use hardwood sleepers, concrete blocks, or galvanised wire mesh panels to create a 1.5m x 1.5m x 1.2m bay. This size is large enough to generate internal heat but manageable to turn.
- Start with a carbon base: Place a layer of coarse carbon material (straw, larger prunings) at the bottom for drainage and aeration.
- Layer greens and browns: Add alternating layers of nitrogen-rich and carbon-rich materials, watering lightly between layers.
- Monitor temperature: Insert a compost thermometer daily until you understand your pile's behaviour. Turn when temperatures drop below 40°C or plateau above 70°C.
Pile fillers for a frost-prone site
Compostable materials for off-grid properties:
- Kitchen: Fruit and vegetable scraps, coffee grounds and filters, tea bags (if unbleached), eggshells, bread and grains, small amounts of cooked food (hot compost only).
- Garden: Grass clippings, leaves, straw, hay, plant material, sawdust (in thin layers), small prunings (shredded).
- Animal: Chicken manure (excellent, high nitrogen), horse manure, cow manure, rabbit droppings. Pet dog and cat faeces should NOT be composted in systems used for food gardens due to parasite risks.
- Household: Cardboard (flattened, torn into pieces), newspaper (in moderation), hair and pet fur, vacuum dust.
When the heap goes slimy
Common compost problems and solutions:
- Pile not heating up: Too dry, too much carbon, or pile too small. Add water, add nitrogen (grass clippings, manure), or add more material.
- Pile smelly and wet: Too much nitrogen, anaerobic conditions. Turn the pile to aerate, add carbon material (straw, cardboard).
- Pile dry and not decomposing: Too much carbon, not enough moisture or nitrogen. Add water, add kitchen scraps or manure.
- Weeds growing in compost: Material was added that hadn't completed pathogen destruction (cold composting weed plants with seeds). Ensure hot composting reaches 55°C+ for weed seeds to be destroyed.
- Flies around the pile: Adding food scraps without covering with carbon material. Always bury food scraps under a layer of brown material.
The Real Cost of Building My Three-Bin System (and the Bit I Didn't See Coming)
Composting systems for off-grid properties range from free DIY approaches to premium commercial products. Here's what the actual numbers look like on my block:
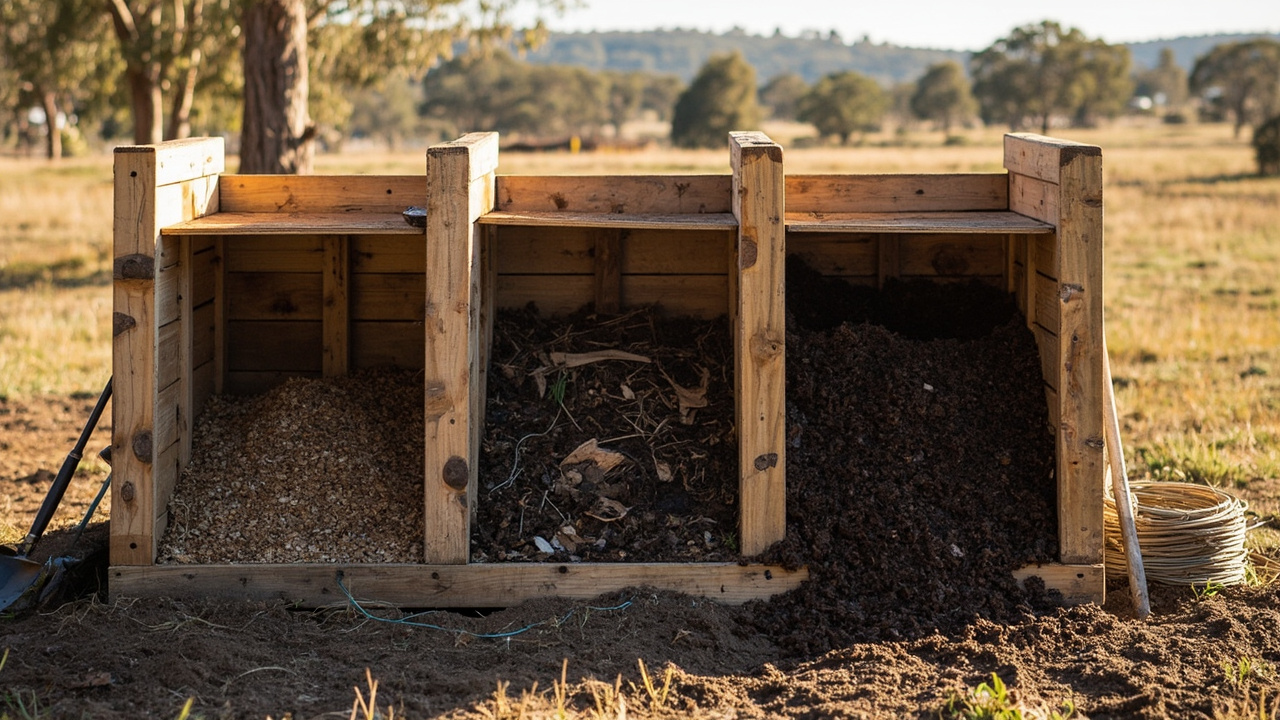
- Free/DIY: Using recycled pallets, concrete blocks, or wire mesh to build bay systems costs nothing beyond labour. A three-bay system can be built from pallet wood and offcuts for under $100.
- Budget tumblers (~$100–$250): Single-chamber tumblers suitable for small properties. Prone to rust and mechanical failure but functional.
- Mid-range tumblers (~$300–$600): Dual-chamber tumblers (fill one side, turn to the other while it composts), better construction quality, UV-stable plastics.
- Worm farms (~$80–$300): Commercial worm farms with stacking trays, taps for drainage.
- Compost thermometers (~$25–$60): Long-probe digital thermometers are essential for hot composting management. The difference between guessing and knowing the temperature is significant for composting quality.
What I didn't see coming
Compounding on my 12 acres in Tassie pays. Homemade compost feeds my off-grid garden, and I've cut or eliminated bought fertilisers altogether, saving $200–$500+ a year on a serious food plot. I've sold worm castings and quality compost to garden centres at good prices, and the reason they pay it is straightforward — it rebuilds soil structure and microbial life that synthetic fertilisers destroy.
The bit I didn't see coming was the contractor who turned my heap to slime. First bay nearly killed the whole project. I dumped a tonne of green scraps in, walked away for three weeks without turning, and came back to a soupy, anaerobic mess reeking of wet dog — heatless sludge, no decomposition worth talking about. Once I got serious about moisture levels and turning the heap on a schedule, the bays started chewing through kitchen waste, garden clippings, and manure without complaint. Output now: dark, earthy amendment that puts commercial fertiliser to shame. The garden's productivity jumped within the first season.
Compost Setups on My 12-Acre Off-Grid Block in Tassie
The kit I actually rely on falls into a few categories. The first is the three-bay pallet system for the bulk of garden and animal waste. The second is a worm farm beside the chook run for kitchen scraps and worm castings. The third is a long-probe compost thermometer — without it I'm guessing, and guessing in a Tassie winter costs me a month of lost decomposition when a pile stalls.
For ongoing monitoring, a moisture meter pays for itself the first time it stops me overwatering a heap in winter. A pitchfork is non-negotiable for turning the bays. Bins and tumblers vary widely; my advice is to start with pallets and only upgrade once you know what volumes your block actually produces — most off-grid properties overestimate their needs in the first year.
Worth a watch: Long drop compost toilet with worms | off-grid & zero waste · Keela Permaculture Farm
They do, and they're a huge part of my setup. My rule is simple — if you can't eat it, it goes to the chooks. They scratch through scraps, turn things over, and add their own manure to the pile, which speeds the whole job along.
Disclosure: some links in this article are affiliate links. If you buy through them we may earn a small commission at no extra cost to you.
The contractor who turned my heap to slime
While many off-grid projects are achievable as DIY, certain situations require licensed professionals:
- Electrical work beyond basic 12V DC additions — requires a licensed electrician
- Structural modifications to buildings or load-bearing elements
- Gas line installation or modification
- Solar array installations above safe voltage thresholds
- Any work that affects the structural integrity of your property
Always check local regulations and obtain necessary permits before commencing work.