Building a lithium battery bank for off-grid storage is a serious electrical project. This guide walks through the components, the sizing logic, the safety boundaries, and the steps where Australian regulations mean you'll need a licensed sparky rather than a screwdriver.

By Dave Miller · off-grid sparky · 22 years wiring solar, batteries and sheds in central QLD
“After blowing three $1000 cells from a single 12V 12Ah mistake in my 2020 shed build, I now only ever wire series-parallel packs for my central QLD off-grid systems.”
DIY Battery Bank Building: Complete Guide for Off-Grid Lithium Storage 2026
What a Battery Bank Actually Does
A DIY battery bank stores energy from renewable sources such as solar panels or wind turbines, providing backup during outages or off-grid power. In practice, it is the buffer between your generation source and your loads — solar only shines effectively for about six hours per day, so usable energy after 5–6pm has to come from what was banked during the day.
The core components of any off-grid battery bank are consistent across chemistries:
- Batteries (cells or pre-built modules)
- Battery Management System (BMS)
- Inverter (DC → 230V AC, 50Hz in Australia)
- Charge controller (regulates incoming PV/wind charge)
- Cables, busbars, connectors, breakers/fuses
- Enclosure or housing
Each of these has a defined job. Skipping any of them, or undersizing them, is how DIY banks fail early or fail dangerously.
Lithium vs Lead-Acid: Why LiFePO4 Dominates Now
Lithium-ion batteries are often preferred over lead-acid for DIY battery banks because of their higher energy density and longer lifespan. Within the lithium family, LiFePO4 (LFP) has become the default for stationary off-grid storage because the chemistry is thermally more stable than NMC or NCA variants — that is the safety margin you want when a pack is sitting in a shed at 35 °C.
Lead-acid still has a place for very large stationary banks on a tight budget, but for most Australian off-grid builds in 2026 the case for LFP is straightforward: longer cycle life, deeper usable depth of discharge, lighter weight, and no equalisation charging routine.
Core Components in Detail
Batteries and Cell Matching
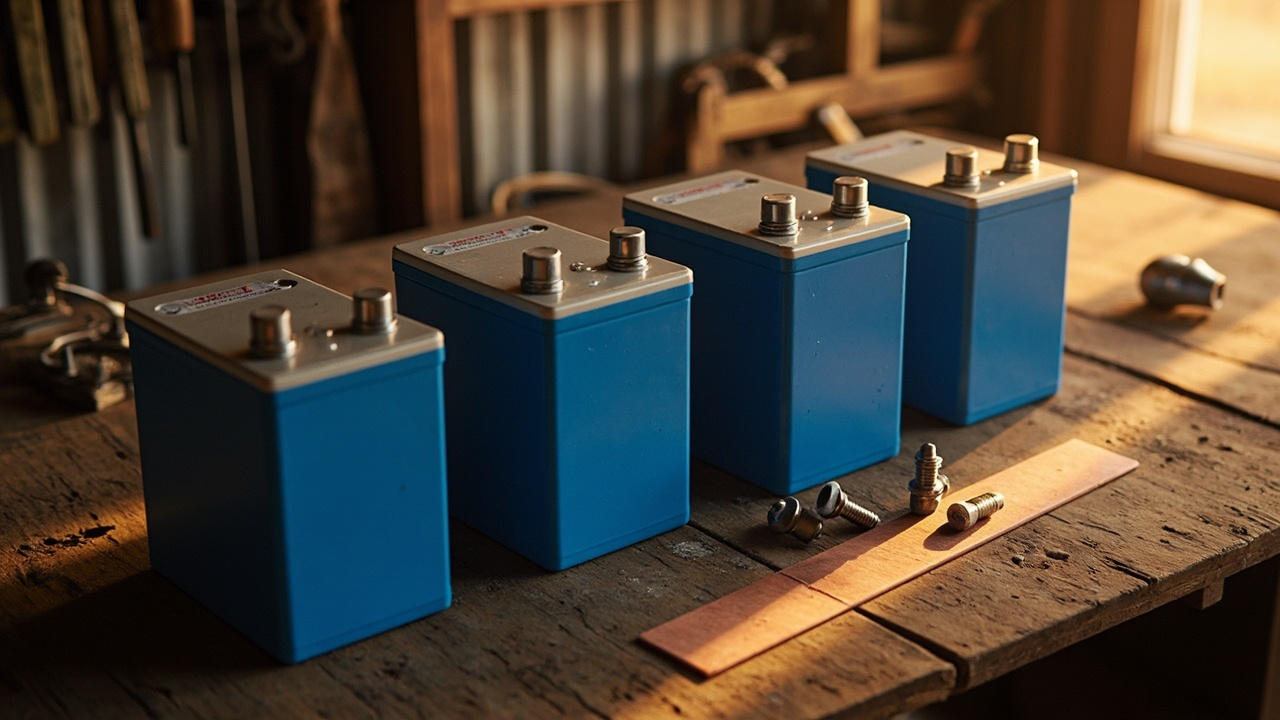
Lithium battery banks are typically built from 3.2V LFP cells. Common cell formats are prismatic (e.g., 280Ah, 304Ah) or cylindrical (e.g., 3.2V 6000–7000mAh in 32650/38120 form factors). The 280Ah/314Ah values only exist in prismatic format (e.g., EVE LF280K, EVE LF304). For a 48V nominal system class, the standard configuration is 16 cells in series (16S), giving a nominal pack voltage around 51.2V and a working range of roughly 48V–57.6V depending on state of charge.
Cells should be matched as closely as possible — in my experience anything beyond roughly 2% capacity or internal resistance variance between cells in the same pack will show up as accelerated degradation within the first 200 cycles.
Battery Management System (BMS)
A BMS monitors and controls batteries to prevent overcharging or over-discharging, which extends lifespan and improves safety. It also performs cell balancing, which is what keeps a 16S pack from drifting apart over time.
For a 16S LFP pack you'll want a BMS rated for the continuous discharge current of your inverter, plus headroom. If your inverter can pull 200A continuously at 48V, a 250A continuous BMS is sensible. Cheap BMS boards with no over-temperature protection or low-quality MOSFETs are where most DIY failures start.
Where the bank is built from parallel strings of 16S, each string should have its own BMS protection (or a BMS topology explicitly rated for the parallel configuration) and its own Class T fuse. Parallel packs do not self-balance reliably once they have diverged — the BMS corrects drift within a string, not between strings.
Inverter
An inverter converts stored DC energy from the batteries into AC power suitable for household appliances, and should be sized to the total wattage of devices to be powered. In Australia that means a 230V/50Hz output, pure sine wave for anything with a motor or sensitive electronics.
Sizing rule of thumb: total continuous inverter load × 1.25 minimum, with surge headroom for motor starting (compressors, water pumps, etc.).
Charge Controller
A charge controller regulates electricity flow from renewable sources such as solar panels to the batteries, preventing overcharging. Modern off-grid systems use MPPT controllers — PWM is only relevant for very small legacy setups.
Cables, Connectors, and Protection
Cables used in a battery bank should be appropriately rated for the expected current load, and connectors should be secure and corrosion-resistant. Insulating materials should be applied to battery bank connections to minimise the risk of short circuits.
DC battery interconnects require appropriately rated DC cable — typically flexible fine-strand (Class 5/6), XLPO- or XLPE-insulated cable such as welding cable or DC-rated automotive cable, sized to continuous current with a voltage rating suitable for the bank. Generic "copper wire" is not a substitute.
For DC strings carrying high current, Class T fuses are appropriate for battery-side protection. ANL fuses are a cheaper option but have a lower interrupt rating and are generally not recommended for large LFP banks.
Enclosure and Ventilation
A well-ventilated enclosure protects the battery bank from environmental elements and helps dissipate heat generated during charging and discharging. In Central Queensland, summer ambient temperatures inside a metal enclosure can easily hit 55 °C+ — that is within LFP's operating window but it shortens calendar life. A sealed IP-rated enclosure with a thermostatically controlled fan is worth the extra spend.
Sizing the Bank
Solar panel arrays are sized in watts (W) or kilowatts (kW), while batteries are sized in watt-hours (Wh) or kilowatt-hours (kWh). The sizing process before you build is the most important step:
1. Energy audit. Analyse recent power bills, identify waste, inspect appliance efficiency, check heating/cooling, replace inefficient lighting, seal air leaks, install monitoring, and adopt energy-saving habits.
2. Daily energy use in Wh. Multiply each device's wattage by its daily run hours, then sum.
3. Days of autonomy. Decide how many days the bank needs to carry the load with no input — typically 1–3 days for off-grid.
4. Depth of discharge (DoD). LFP can be routinely taken to 80–90% DoD; lead-acid should be held to ~50%.
5. Bank capacity. kWh needed = (Daily Wh × Days of autonomy) ÷ DoD.
6. Configuration. Batteries in a DIY bank should be connected in series or parallel depending on voltage and capacity requirements. For a 48V LFP bank: 16S for voltage, then parallel strings of 16S to reach capacity. Parallel strings of 16S require per-string Class T fusing and ideally per-string BMS protection — cell balancing cannot correct divergence between parallel groups, and a faulted string can otherwise drive the whole bank into thermal runaway.
Bill of Materials and Tools
A workable DIY off-grid battery bank typically needs:
- 16 LFP cells (or more for parallel strings, with per-string fusing)
- 16S BMS with appropriate current rating (per-string BMS for parallel configurations)
- 48V inverter (pure sine, 230V/50Hz)
- MPPT charge controller sized to PV array
- Class T fuse holder and fuse on battery positive (one per parallel string)
- DC disconnect/isolator
- Copper busbars (nickel-plated for LFP) and DC-rated flexible cable sized to continuous current
- Heat shrink, terminal boots, insulation
- Ventilated enclosure (metal or IP-rated plastic)
Basic tools for installation include DC-rated flexible cable (Class 5/6 fine-strand, XLPO-insulated, sized to load), appropriately rated breakers and fuses, MC4 connectors (for the PV side), a meter for measuring voltage and current, screwdrivers and wrenches, and a drill with mounting hardware.
Build Sequence
1. Build out the enclosure with mounting points, ventilation, and cable entry glands before any cells go in.
2. Lay cells into holders, confirm all cells are within ~2% of each other on voltage and capacity.
3. Initial top-balance the cells at the bench. Use a bench supply to bring each cell individually to within roughly 10–20mV of the others before any series connection is made. The BMS balance current is typically in the mA range and is not a substitute for first-formation balancing — relying on it for the initial match can take days or weeks and is not safe practice.
4. Install busbars and connect cells in 16S configuration. Torque to spec — loose LFP terminals create resistance hot spots.
5. Fit the BMS, balance leads on every cell, main B- lead to the shunt.
6. Connect Class T fuse, isolator, then inverter and charge controller DC inputs.
7. Connect the PV array through MC4 connectors to the charge controller.
8. Commission the inverter, set charge parameters for LFP (bulk/absorption 56.8–58.4V for a 16S pack at 3.55–3.65V per cell; float typically disabled or set to 54.0–54.4V at 3.375–3.4V per cell).
Safety — and When to Call a Licensed Professional
Battery banks store lethal DC. A 48V battery bank must be treated as hazardous: arc-flash and shock risk are present at this voltage when fault currents are high. The available fault current from a 200Ah+ LFP bank can weld steel, ignite cable insulation, and cause severe arc-flash burns within milliseconds.
Call a licensed electrical professional (electrician) when:
- Connecting the AC side of the inverter to a switchboard, sub-board, or any hardwired 230V load in a dwelling — this is notifiable wiring work in every Australian state and territory.
- Installing any AC breaker, RCD, or MEN link.
- Sizing or upgrading the PV array above the inverter's max PV input.
- Any work on a system that feeds back to grid (even briefly during a blackout via a non-isolated inverter).
- Any hardwired DC work above extra-low voltage — PV string wiring above 50V DC Voc, and fixed battery banks tied into the switchboard or MEN — must be done or certified by a licensed electrician under AS/NZS 3000 in most Australian states and territories.
DIY-scope work (with appropriate PPE):
- Building the DC battery bank from low-voltage cell interconnects where state rules permit, BMS wiring, DC cabling and fusing.
- Mounting PV panels and running DC cable to the charge controller (subject to working-at-heights rules).
- Installing DC isolators.
Always wear insulated gloves, a face shield, and have a Class C fire extinguisher rated for electrical fires within reach. Remove all metal jewellery. Never work on a live bank.
Kit vs Custom
Pre-configured solar kits offer lower upfront expense and self-paced installation, while custom-built systems offer more flexibility and can be tailored to specific energy needs. For battery banks specifically, there is a third middle path: buy a pre-assembled 48V LFP module from a reputable supplier and integrate it into a custom enclosure and cabling layout. That cuts the highest-risk part of the build (cell matching, BMS integration, spot welding) while still leaving the system design and AC integration to you or your sparky.
Expected Savings
Building an off-grid solar system can deliver annual savings often ranging from $1,500 to $2,500 — though off-grid systems rarely deliver pure "savings" in the way grid-tied systems do, because the comparison is against the cost of running a generator or not having power at all. The honest framing is: avoided diesel cost, avoided grid-extension cost, and predictable energy bills.
FAQ
How many cells do I need for a 48V LiFePO4 bank?
Sixteen cells in series (16S) is the standard configuration. Each LFP cell has a nominal voltage of 3.2V, giving ~51.2V nominal. Parallel strings of 16S need per-string fusing and ideally per-string BMS protection.
Can I mix batteries of different ages or brands?
No. Mixing cells with different internal resistance, capacity, or age causes the stronger cells to overwork and the weaker ones to drift, which shortens pack life and can trip the BMS repeatedly.
What size BMS do I need?
Match or exceed the continuous current rating of your inverter, and make sure the BMS has over-voltage, under-voltage, over-current, short-circuit, and over-temperature protection at minimum.
Do I really need a fuse on the battery?
Yes. A Class T fuse on the battery positive, sized just above the maximum expected load but below the cable's ampacity, protects against catastrophic DC short circuits. Parallel strings each require their own Class T fuse.
Where should the battery bank live?
In a ventilated, shaded enclosure, ideally on a non-combustible surface, away from living space and direct sun. In CQ summer conditions, active ventilation or even air-conditioning of the battery room is justified for long calendar life.
Is this legal to do myself in Australia?
The DC battery and PV side is generally within scope for a competent DIYer for low-voltage cell interconnects. Hardwired DC work above extra-low voltage (PV strings, fixed battery banks tied into the switchboard or MEN) and all AC side work — inverter output into your switchboard, any 230V wiring — must be done or at least certified by a licensed electrician under AS/NZS 3000 and state/territory electrical safety rules. Check with your local regulator before you start.
Sources
- https://www.greenlancer.com/post/diy-battery-banks
- https://shopsolarkits.com/pages/diy-solar-guide
- https://bslbatt.com/blogs/diy-instructions-for-off-grid-solar-system-installation-guide/
Worth a watch: How to Build a DIY Lithium Solar Battery Bank (Step-by-Step) - Assemble Part 2 · ROD Vlogs-v.2
Disclosure: some links in this article are affiliate links. If you buy through them we may earn a small commission at no extra cost to you.