By Dave Miller· off-grid sparky · 22 years wiring solar, batteries and sheds in central QLD
“After burning my first batch of tomatoes by trusting a cheap 12V controller over a proper 24V setup, I learned voltage stability is the only thing saving your food in the central QLD heat.”
Solar Food Dehydrator: Off-Grid Aussie Survival Kit
A 24V solar food dehydrator can provide more stable operation than a 12V setup, helping reduce uneven drying and tomato burn risk in Queensland conditions. The design should prioritise controlled airflow, sensible temperature management and reliable power. Use the guide to plan a system suited to your food and local heat.
Look, if you're off-grid in Australia, you're not waiting for the power to come back. You're drying food in the sun. No electricity. No fluff. Just survival.
Look, if you're off-grid in Australia, you're not waiting for the power to come back. You're drying food in the sun. No electricity. No fluff. Just survival.
Component flow diagram wiring a 24V solar food dehydrator with thermostat cut-out.
Design: Keep It Simple, Stupid
Forget fancy gadgets. A solar dehydrator is a box with a glass top, dark interior, and airflow holes. The sun heats the box, the dark surface absorbs heat, and air moves through vents. Done.
Simple wooden solar dehydrator in outback
Key features you need:
Black interior – absorbs heat like a boss (paint your box black)
Double glass top – traps heat (use old window glass)
Reflectors – angle aluminium foil to bounce more sun in (cheap, easy)
Bottom vents – let hot air out (no stagnant air)
Temperature Control: No Thermostats Needed
Temperatures in a solar dehydrator swing with the sun. That's fine. You don't need 50°C – 45-60°C is perfect for drying. Here's how to manage:
Shade it at night – cover with a tarp to stop heat loss
Adjust vents – open more if it's too hot, close if it's cooling down
Use a thermometer – cheap $5 digital one from Bunnings. Check every 2 hours.
Don't sweat it if it hits 65°C. Just move the trays to a shadier spot. Over-drying is better than mouldy food.
Drying Times: No Magic Numbers
It's not like the instructions say "dry for 8 hours". Depends on:
Weather – 35°C with sun? 6-8 hours. Cloudy? Double it.
Food type – berries dry fast (4-6 hrs), meat takes 10-12 hrs.
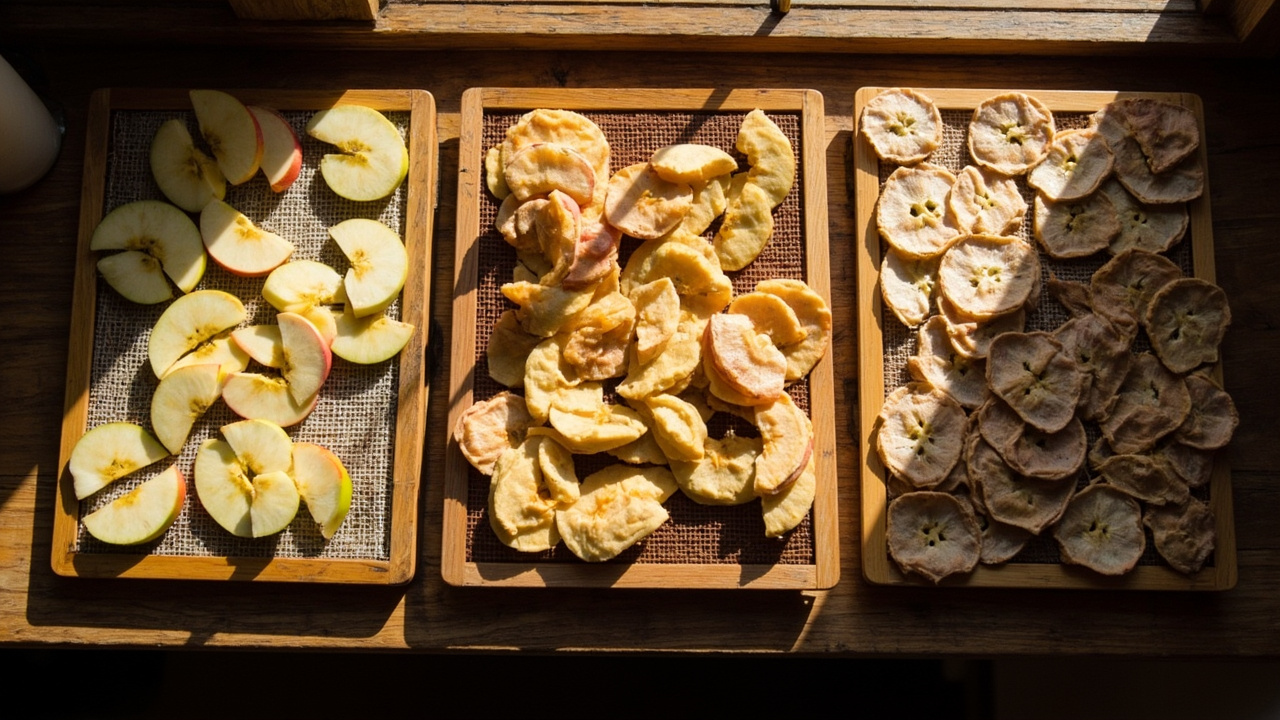
Three trays show varying stages of fruit drying.
Test it: Grab a piece. It should be leathery, not sticky. If it bends without breaking, it's done. If it snaps, it's over-dried. Adjust next time.
Practical Tips: What Works in Australia
Don't dry meat in the tropics – humidity will kill it. Only do it in dry inland areas (Outback, Central Australia). Use salt and smoke first.
Prep is everything – blanch veggies first (30 seconds in boiling water). Stops enzymes and speeds drying. Saves time, saves food.
Store properly – once dry, seal in airtight containers. No plastic bags – they trap moisture. Use glass jars or vacuum-sealed bags. Keep in a cool, dark place.
Australian Suppliers & Pricing (indicative prices)
Don't buy expensive imported units. Build your own for $50. But if you want ready-made:
Dehydrator Australia (Sydney)
Solar Box Dehydrator (DIY kit) $129 (includes black paint, vents, instructions) Best for beginners. Ships Australia-wide.
Off Grid Australia (Perth)
Solar Dehydrator Kit (pre-cut wood) $199 For serious off-griders. Includes reflector panels.
Bunnings (Nationwide)
DIY components (black paint, glass, aluminium foil) $25-$40 Build your own. Cheaper than buying a kit.
Stop overcomplicating it. Build one this weekend. Dry some fruit. You'll be eating free food for months. No power bills. No excuses.
⚠️ SAFETY WARNING: Working with electrical systems, structural modifications, or gas installations carries inherent risks. If you are not confident in your abilities, always engage a licensed professional.
Shawn Woods walks you through the exact steps for building a 100% solar dehydrator using cheap materials you can get at any hardware store, and he shows the thermostat wiring so you avoid power waste on overcast days.— Dave Miller
When to Call a Professional
While many off-grid projects are achievable as DIY, certain situations require licensed professionals:
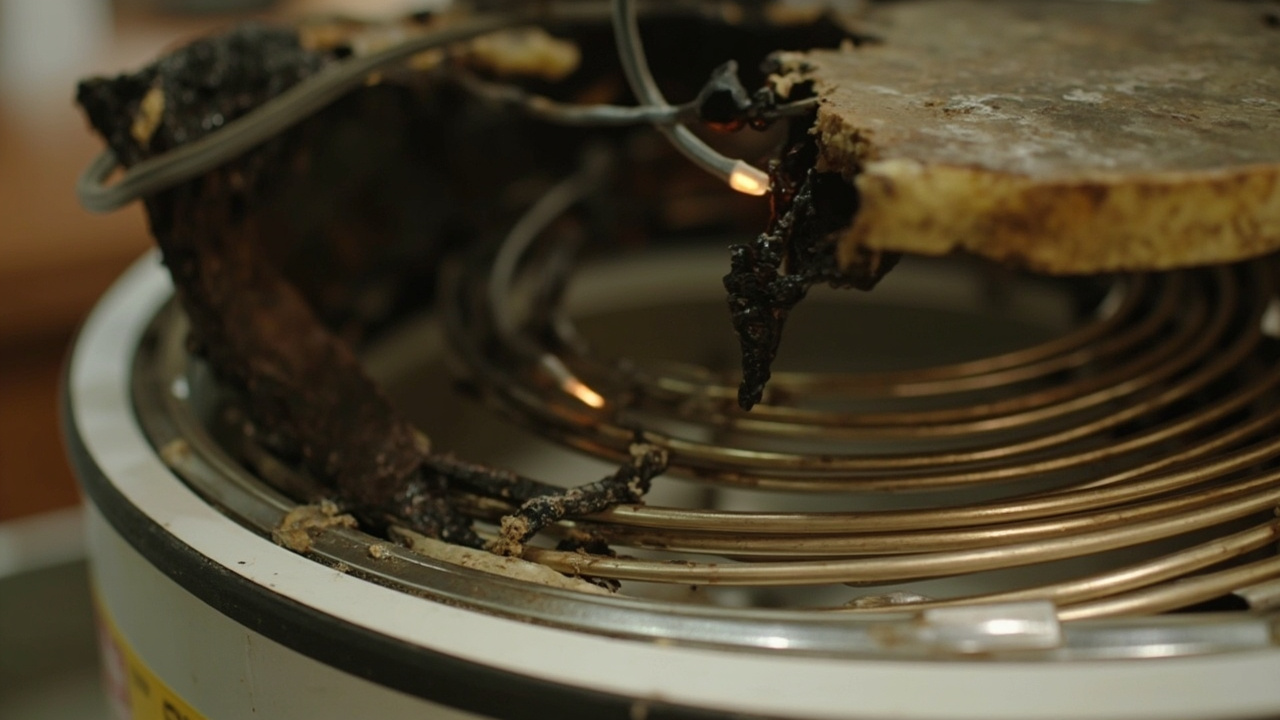
Scorched heating coil requires professional repair
Electrical work beyond basic 12V DC additions — requires a licensed electrician
Structural modifications to buildings or load-bearing elements
Gas line installation or modification
Solar array installations above safe voltage thresholds
Any work that affects the structural integrity of your property
Always check local regulations and obtain necessary permits before commencing work.